How To Guide – Tip Eye Replacement
Just a short one from me today. During my last session fishing I noticed that when winding in there was a lot of movement in one of my rod’s tip eyes. On closer inspection and with very little effort I found that the glue holding the eye in place had come unstuck, and with very little persuasion the eye could do a full 360. I firmly taped it in place for the rest of the session but knew I needed to fix it before I headed out again.
It’s very simple to change a tip eye on a rod and this method can be used to replace tip eyes on every single type of rod. Although the lighter you go the more delicate you have to be. In my case I didn’t need to work the tip eye the rod blank, but if I had needed to I would have gently heated up the female part of the tip eye (the bit the blank tip is inserted in to), until I could pull the tip eye off with a pliers. I would say, be careful, and if you heat it up too much you will damage your rod blank. You will need
- Lighter.
- Hot Melt Glue Stick (hobby glue gun)
- Pliers
- Replacement Tip Eye
I already had a tip eye and it only needed re-gluing, but if you take the remove the old tip eye and take it to a tackle shop, they should have a few options to choose from as the internal diameter of the tip eye will vary and you need a snug fit. I think mine is a 2.4mm Fuji Zircon tip eye.

1. I didn’t need to do this step, but to remove your broken tip eye, heat the section of eye that is on the rod and holding the pliers gently trying to pull it off the blank. It may be easier to use the pliers and hold the eye itself, rather than the stem if you are worried about crushing the blank.

2. Clean off any excess/old glue to ensure a good seal next time.

3. Heat the hot melt glue using the lighter (or use a hobby glue gun and squirt glue down into the hole of the new tip eye).

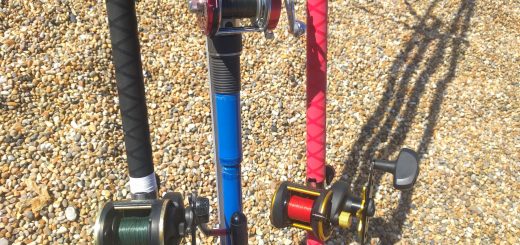
Excuse the state of the reflective tape!
4. Once the glue is hot, you will see it starting to melt, push the cylindered end of the eye through the hot glue and as quickly as you can, push it down on to the rod tip (If you have glue gun you don’t need to do this). The glue will start to cool very quickly.
Align the tip eye with the rest of the eyes on the rod and leave to set. It should be ready to use in a few hours!
That’s that! You now have a successfully fitted new tip eye. Have a few box modifications to make this make to stop everything rattling around, but am really looking forward to getting back out there sometime soon! Until then…

Recent Comments