It’s been a while since I’ve looked at my match top 3, and recently after switching all my heavy elastics to Dacron connectors I have unfortunately neglected my number 6 elastic, which has well and truly perished. I had to do the fiddly job of re-elasticating my top kit, I decided not to use a Dacron connector on this lighter elastic, and went with the more conventional elastic connector. In the past I have been asked “what are the best knots to use when using tying elastic to connectors?” I never really thought about what knot I used at the time, so now when refreshing my elastic I decided to have a look at a two variations and answer the question. There are 2 types of knot which I have used, and neither of them have ever failed (on me) but have a look at see which one you’d prefer.
 |
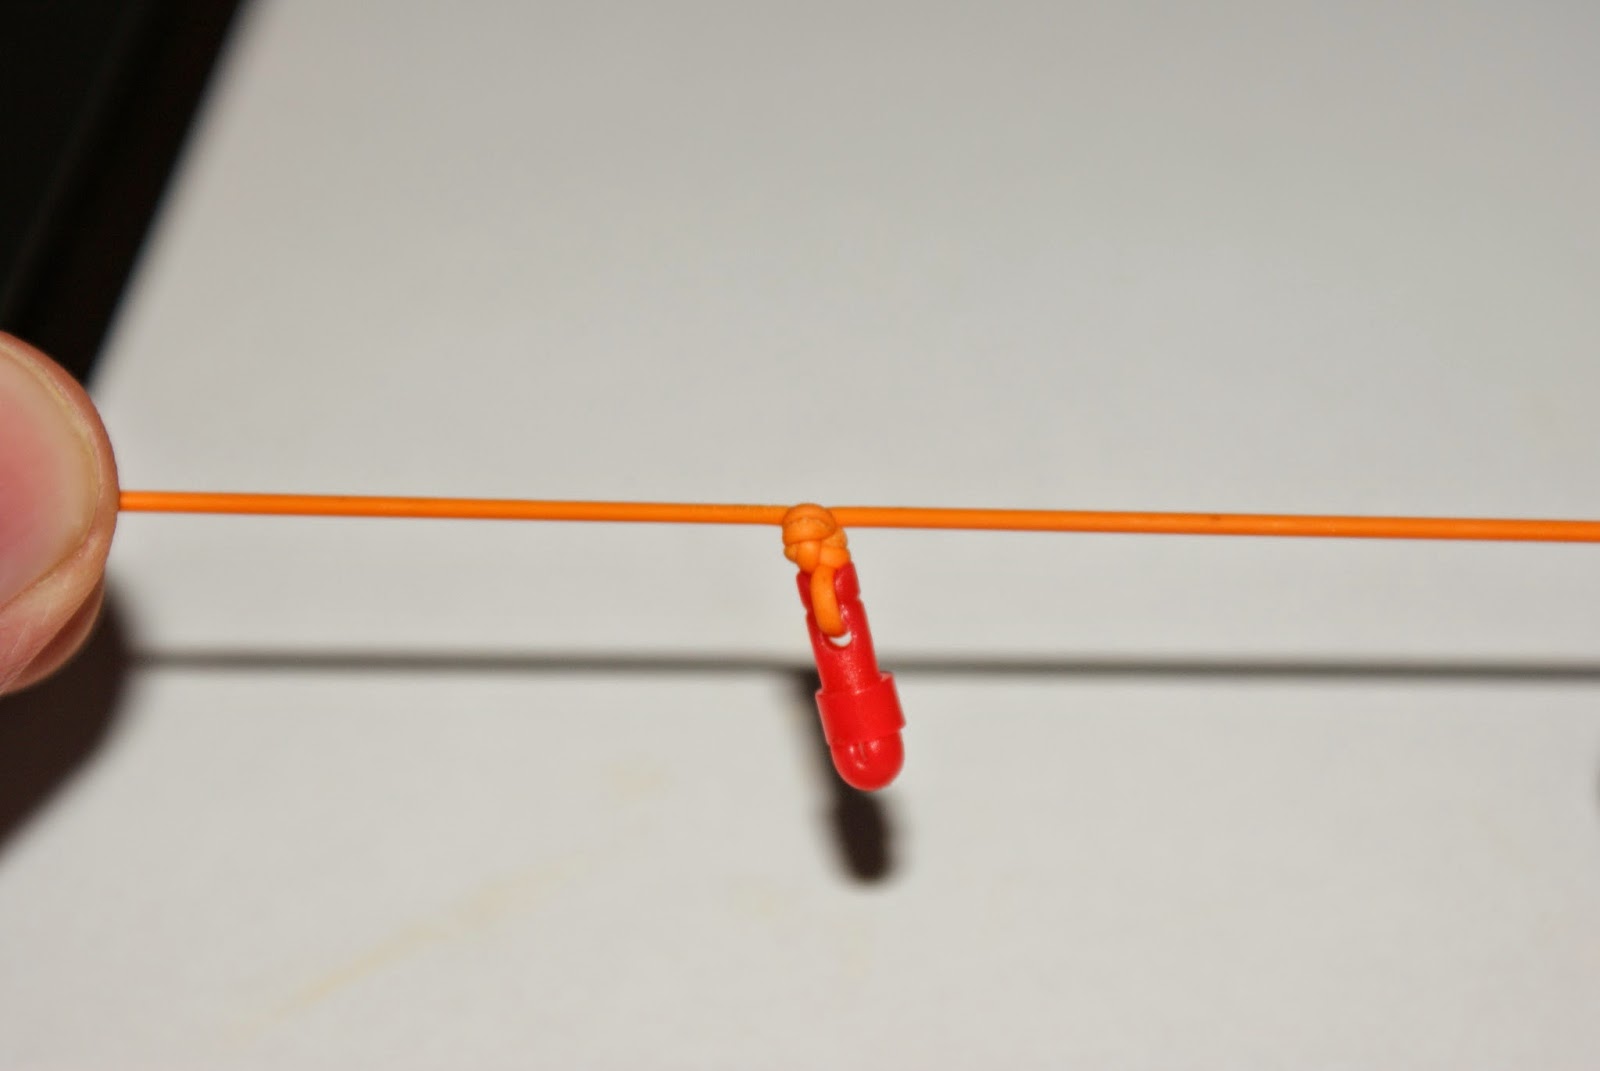
| It’s that time of year when elastics get changed! |
Standard Loop Knot
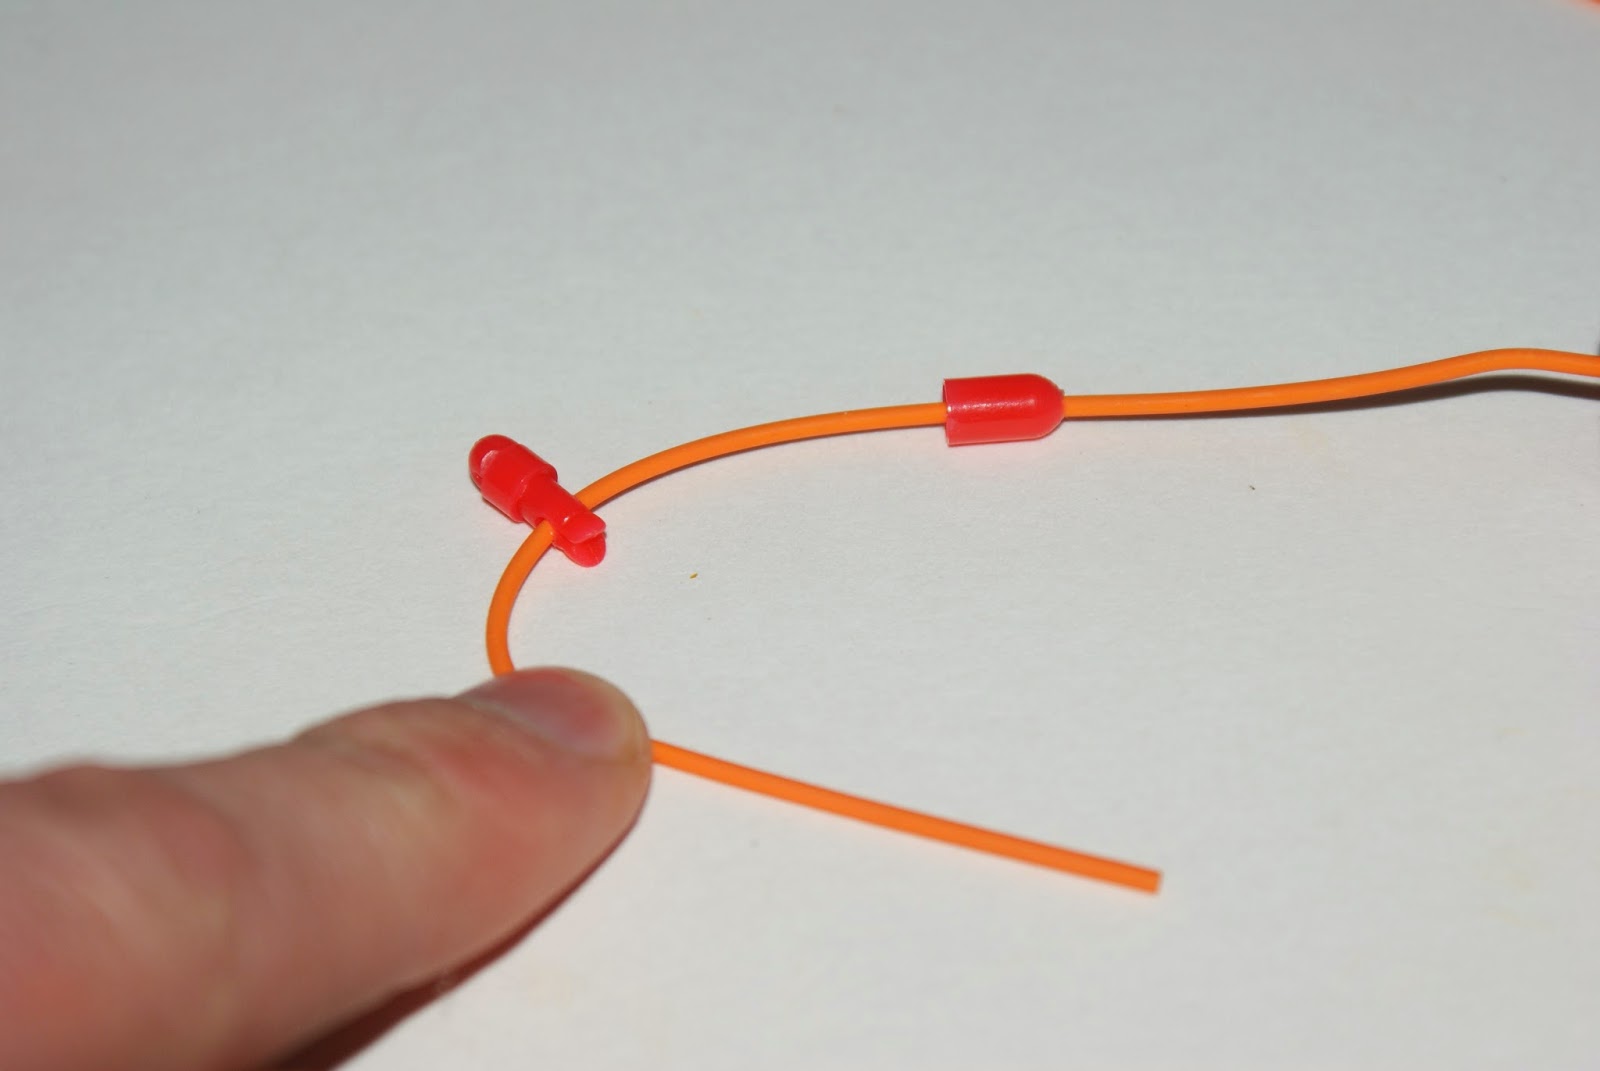
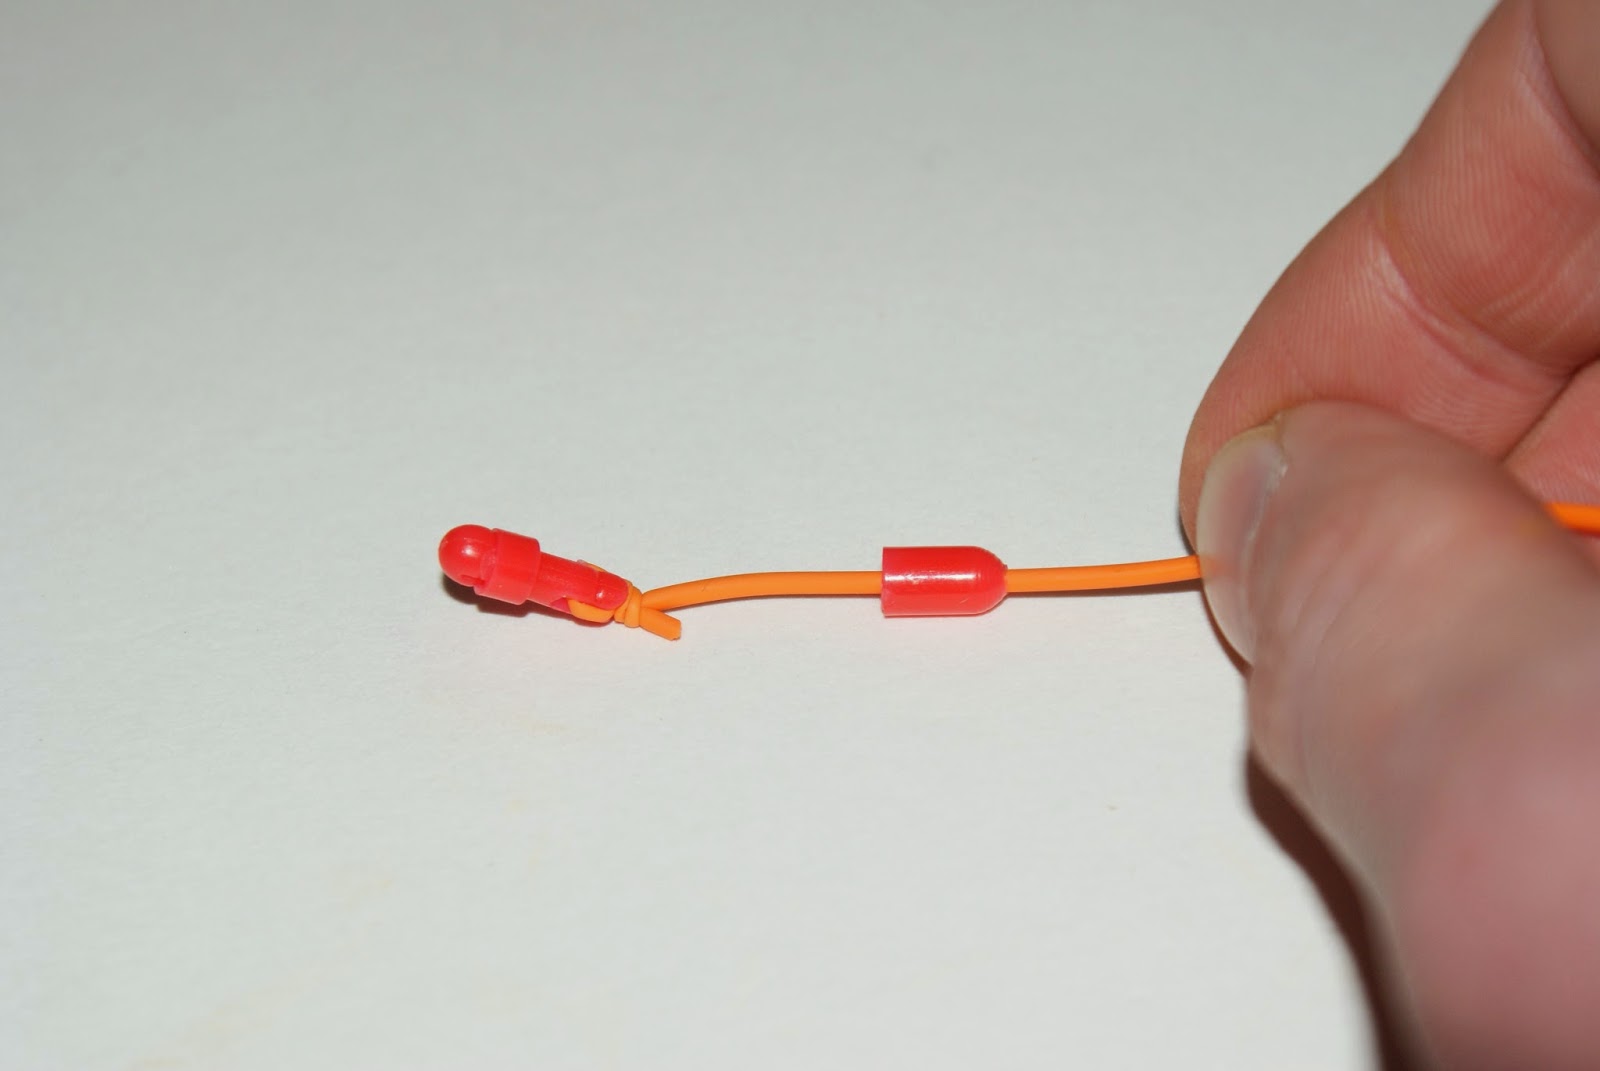
1. Separate the connector into the 2 pieces and thread the smaller end down onto the elastic. Push the smaller cap end of the connector down the elastic as this is then used once the knot has been tied.
2. Thread the elastic through the small hole in the remaining part of the connector. Then bring the tag end against the other piece of elastic and form into a loop.
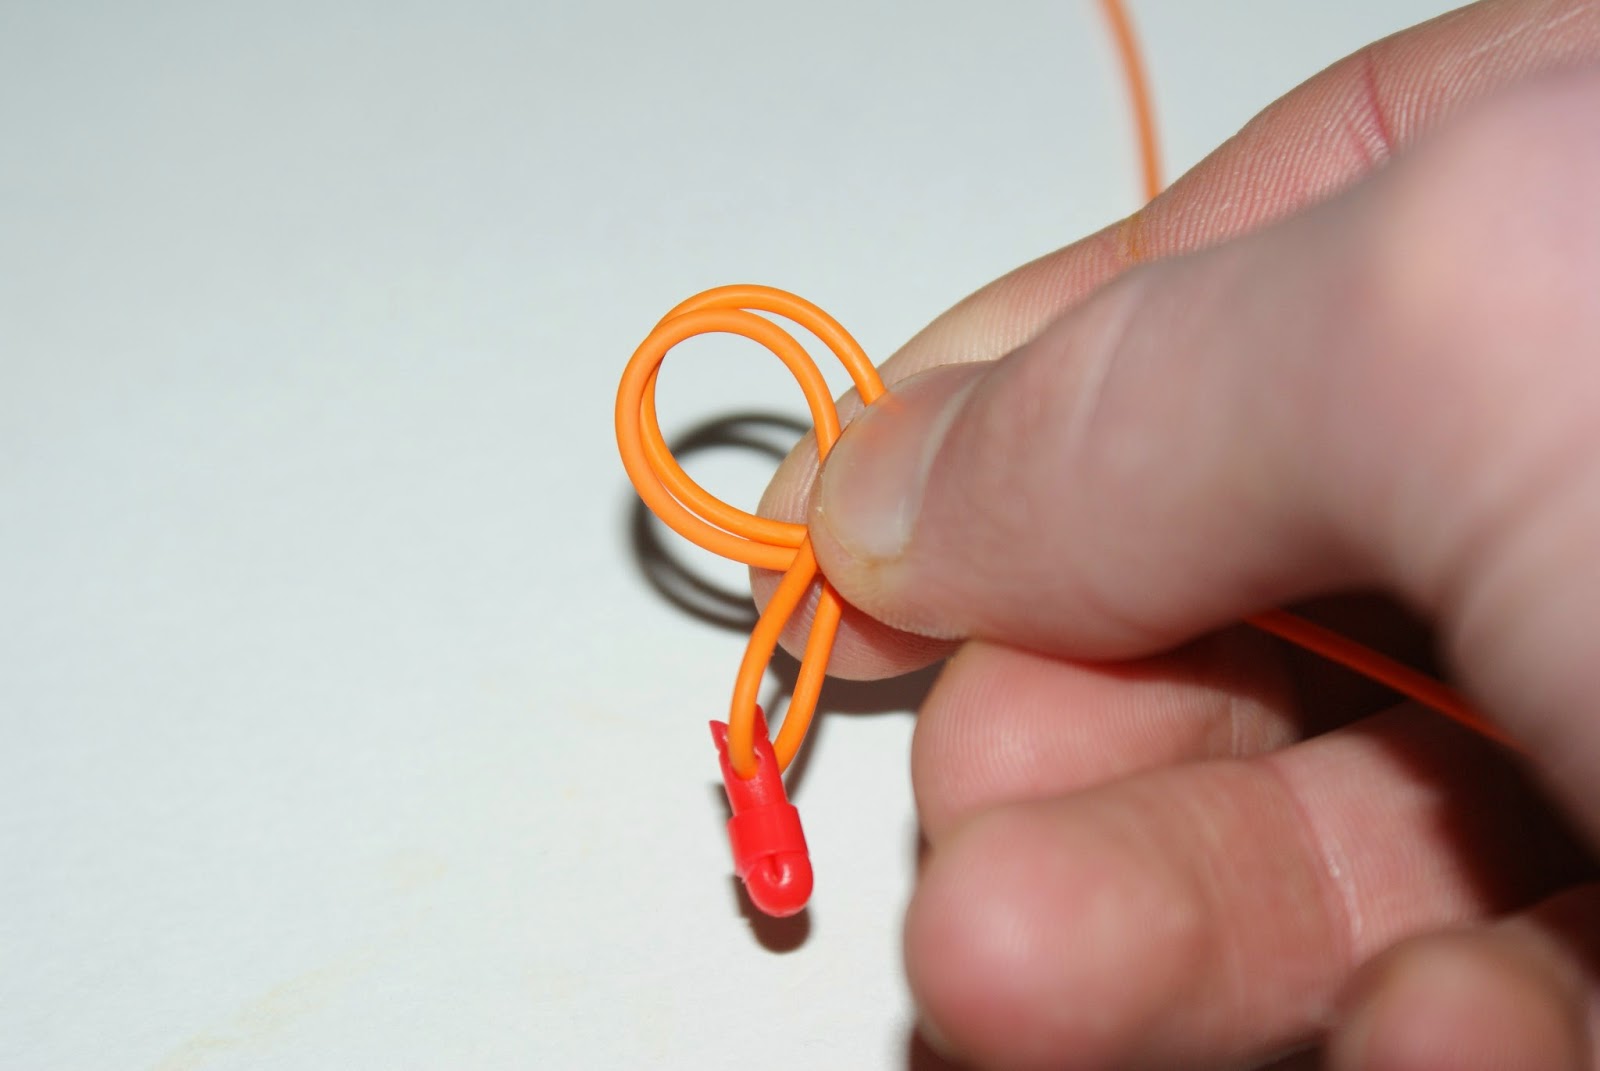
3. Threading this loop over the double elastic will create another loop. Pass the connector through the loop, to create the start of the knot.
4. Holding both pieces of elastic and the connector, pull tight to bring the knot up to the connector.
5. Before fully tightening the knot in the elastic make sure you lubricate the knot and the friction caused from tightening then knot might perish the elastic and causing it to weaken.
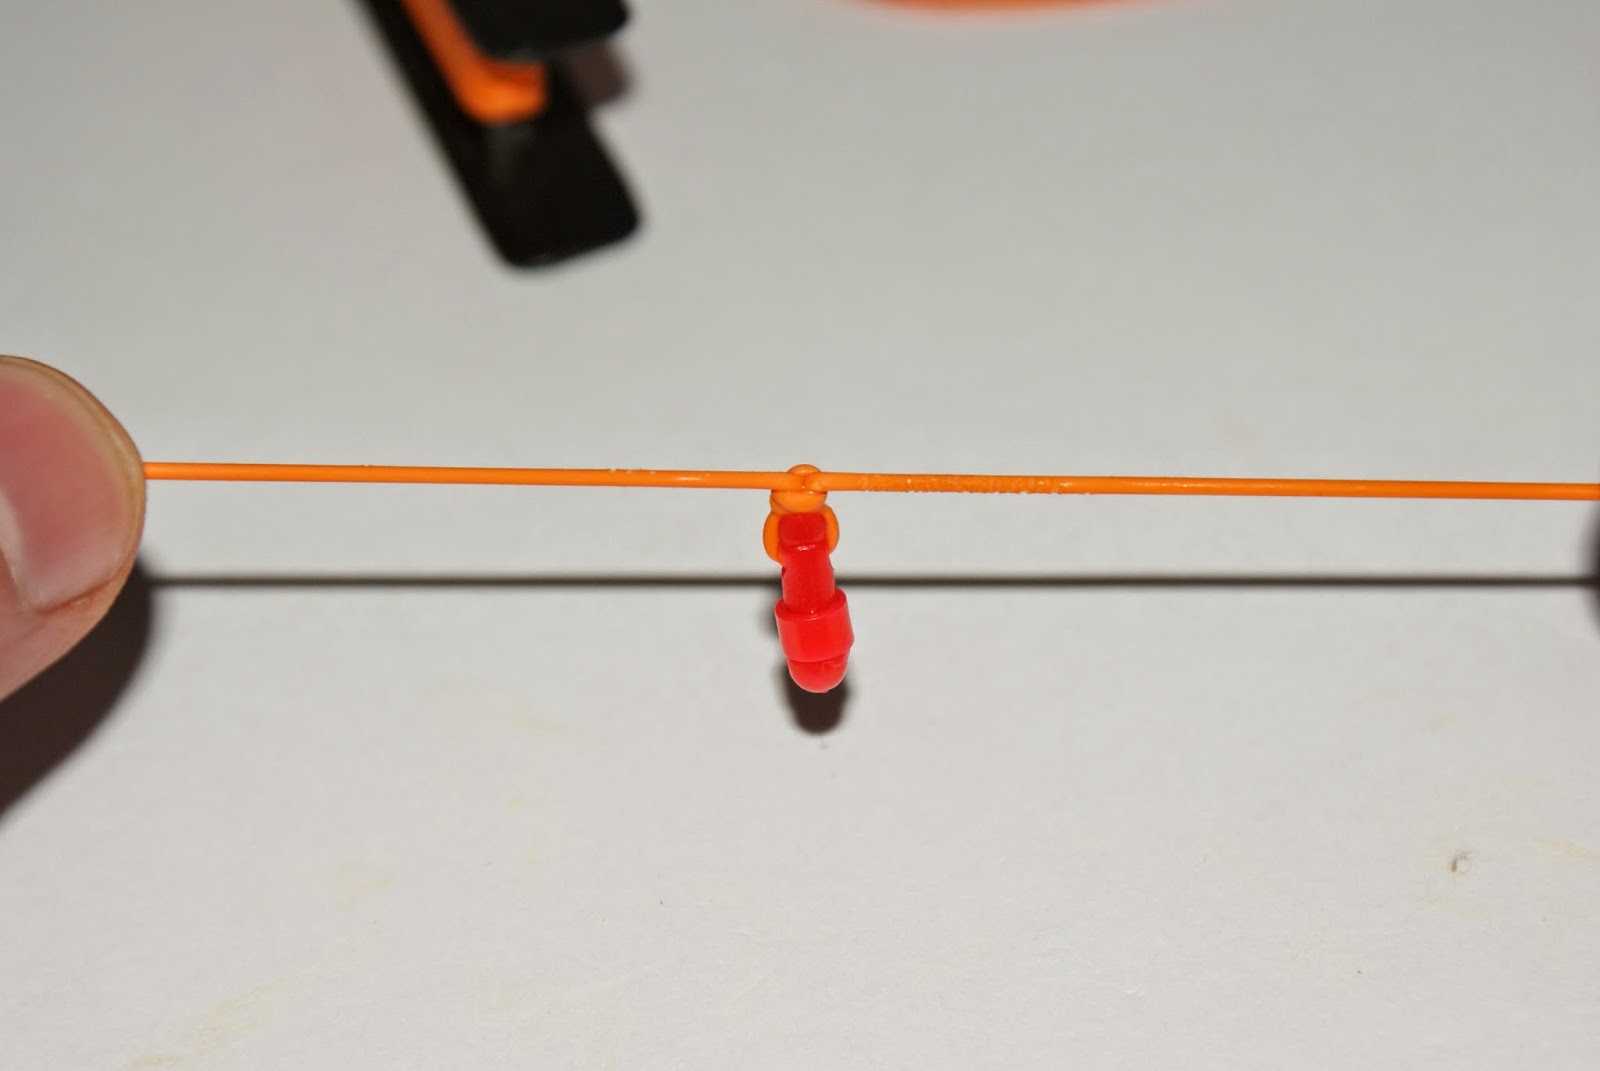
6. Pull both pieces of elastic to force the knot tight to the connector, and give a final pull to ensure all knots are snug.
7. Cut the short piece of elastic close to the knot. I tend to leave 1 or 2 mm of spare elastic just in case the knot slips slightly.
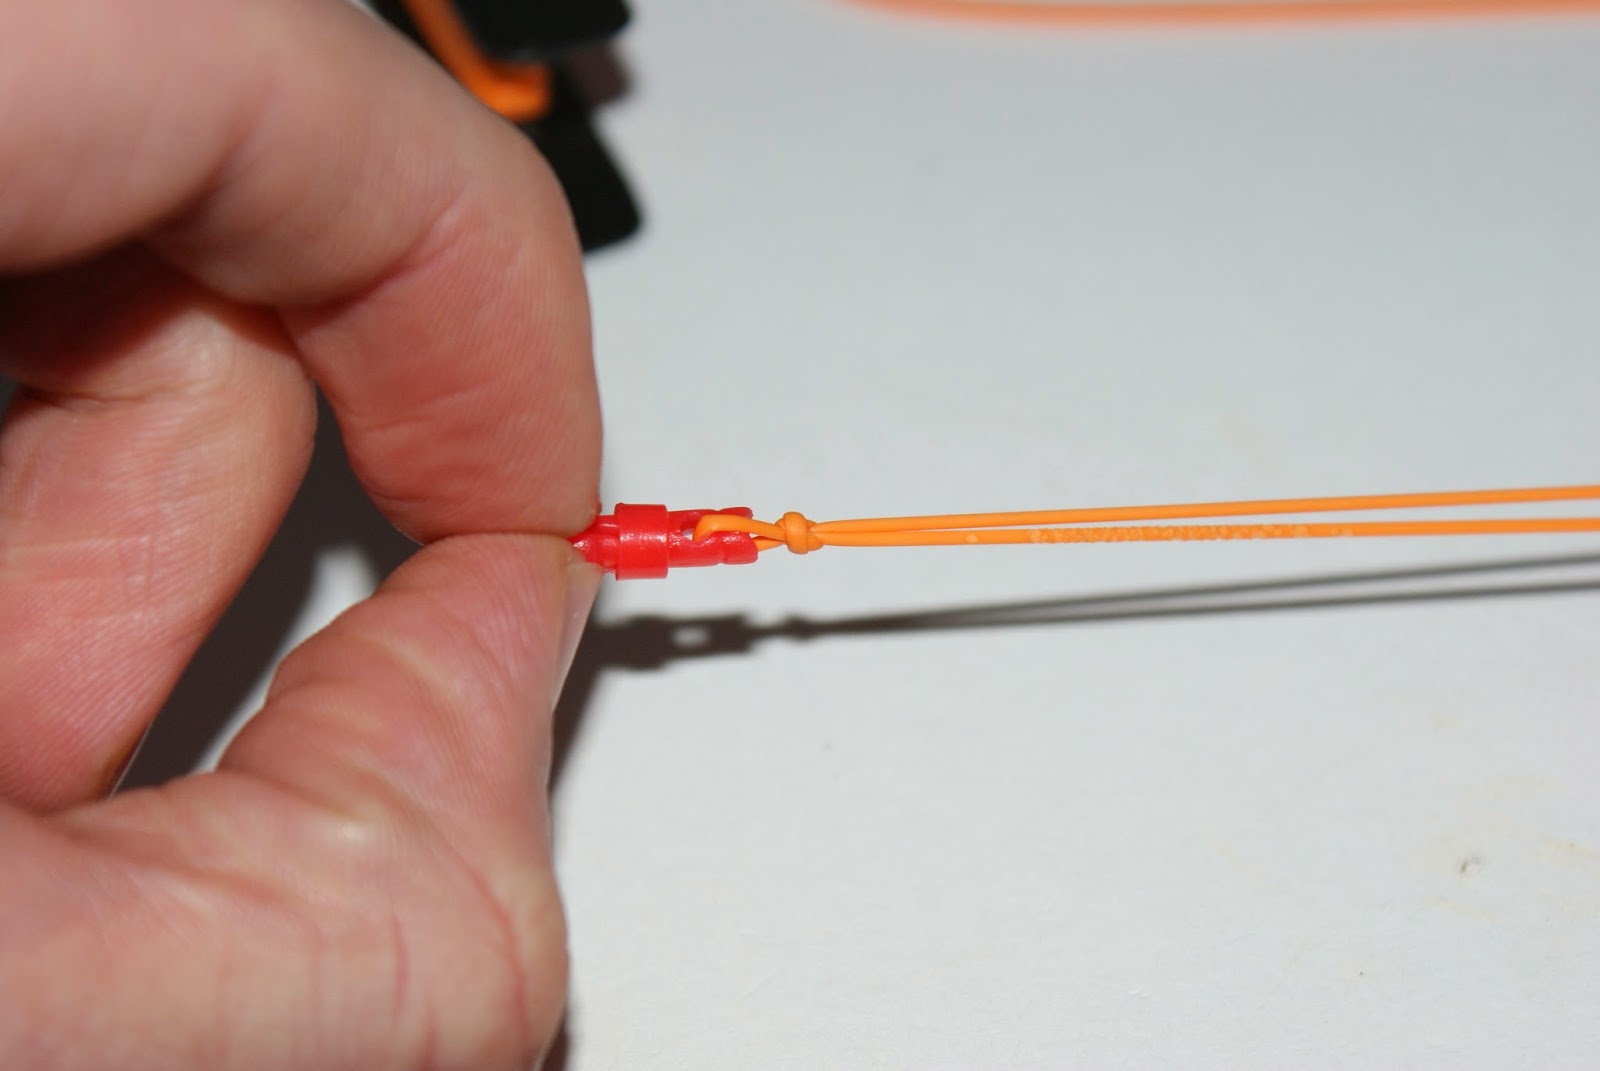
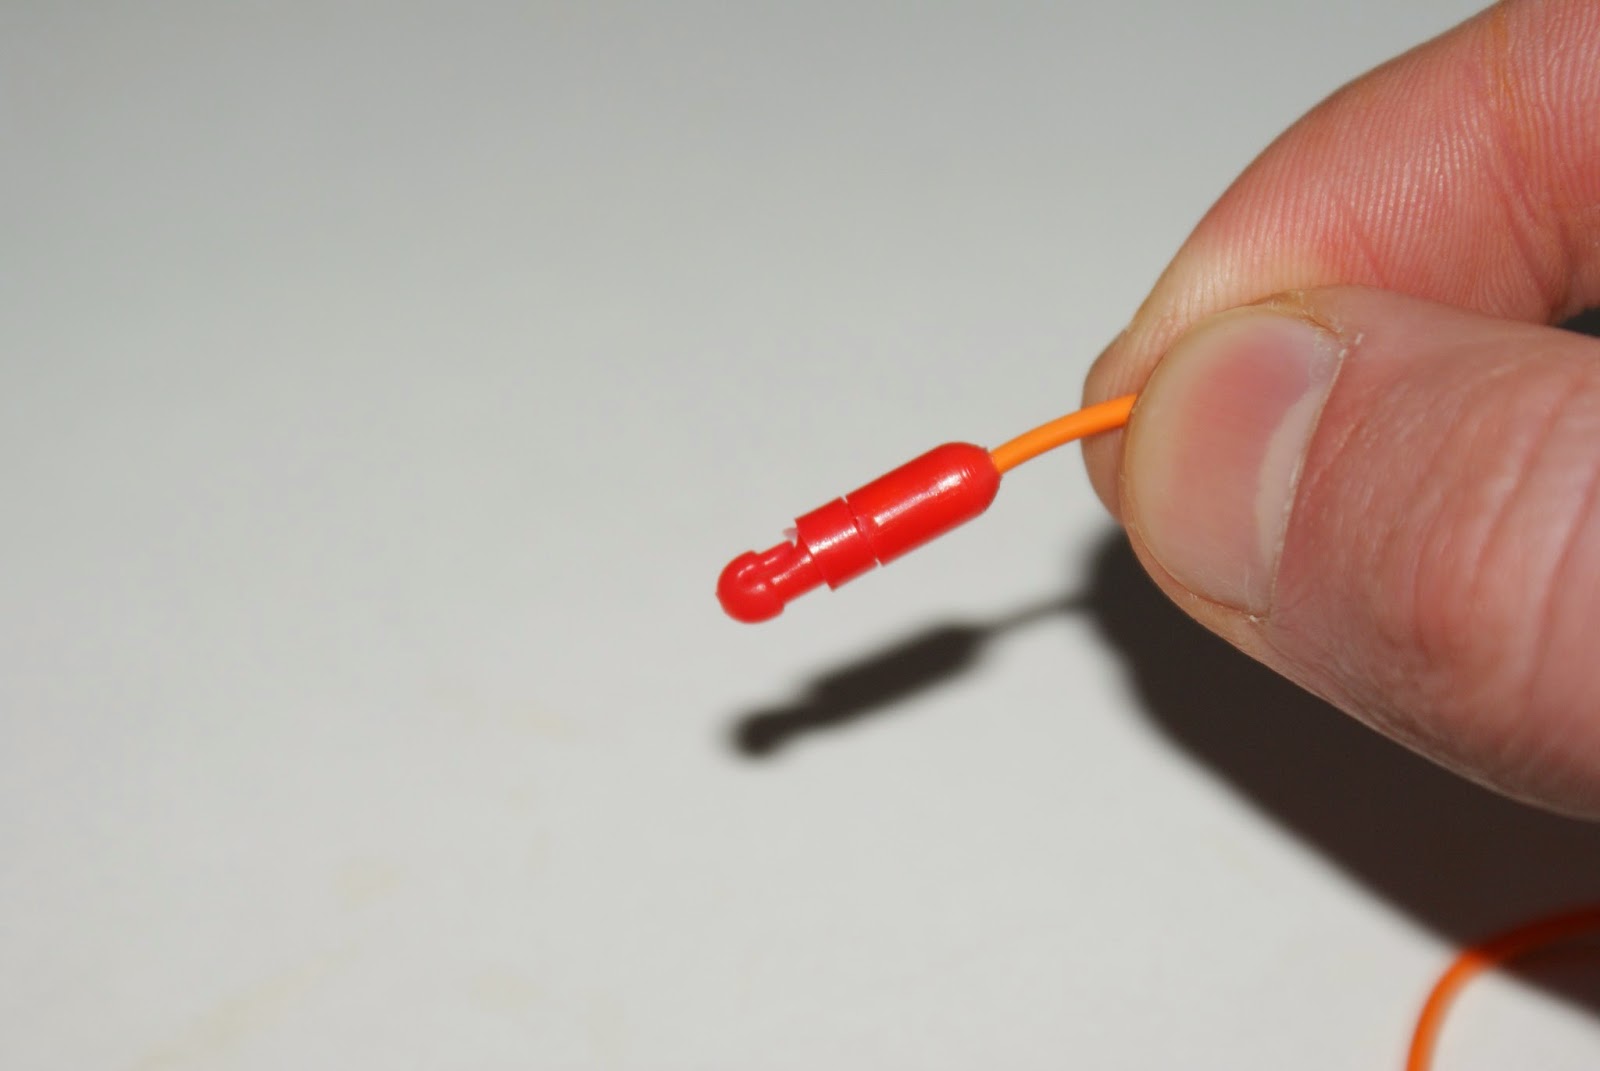
8. Once trimmed bring the cap end of the connector back up the elastic, pushing it up and over the knot and onto the connector. It should fit snugly into place.
That’s the standard loop knot finished!
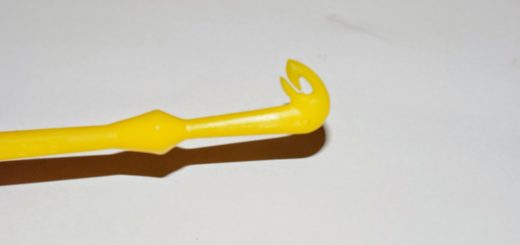
Figure 8 Loop Knot – Slightly different, this is my preferred option (and Sir Bob Nudd’s apparently).
1. See steps 1 and 2 above.
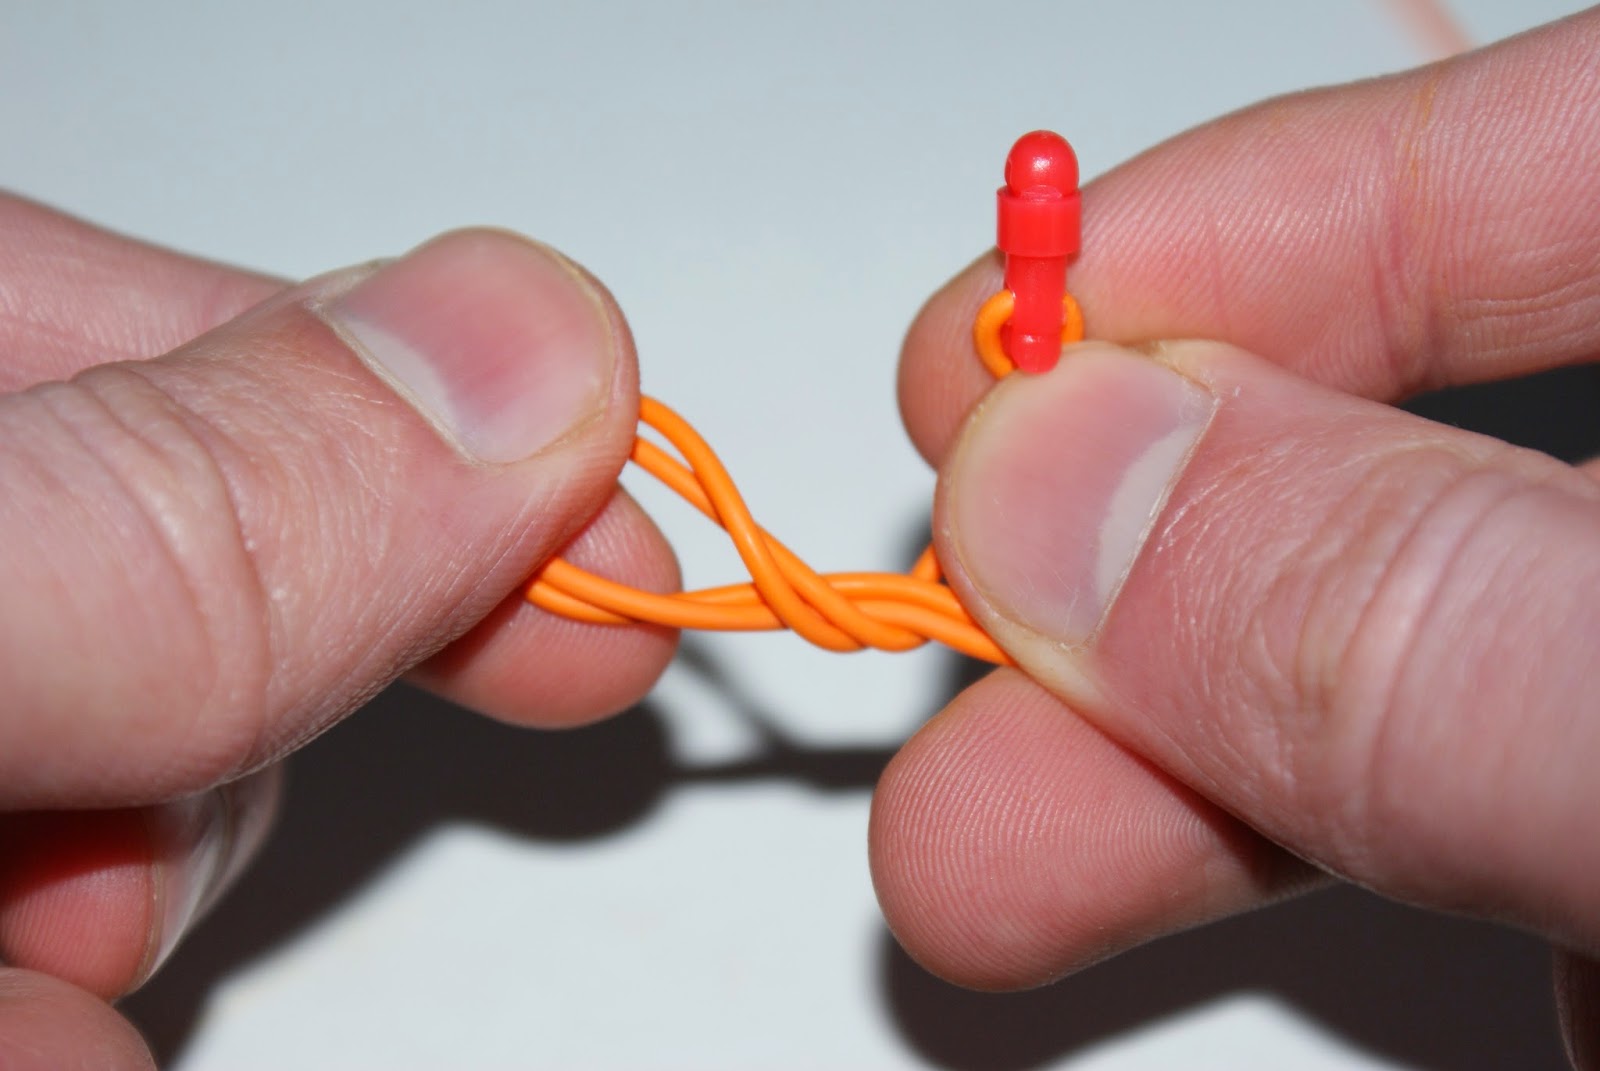
2. Pass the connector around the 2 pieces of elastic and then back through the loop.
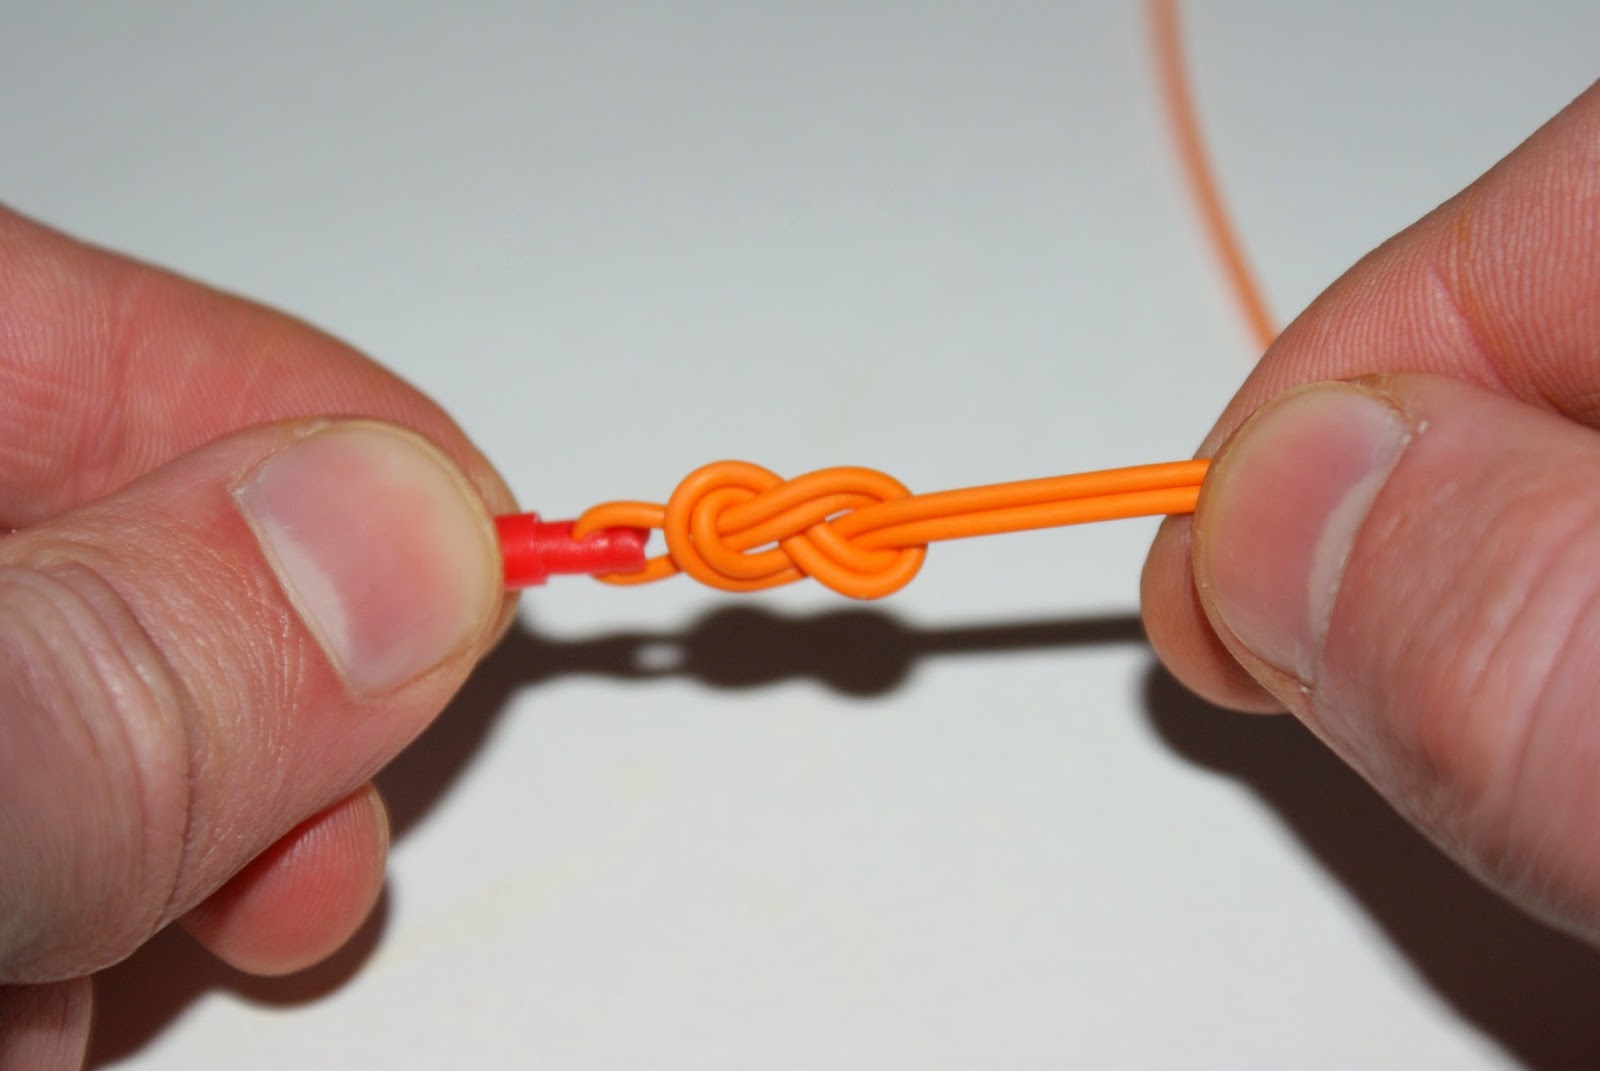
3. This will a figure 8 shape (so you’ll know if you’ve done it correctly), which can be tightened up to the connector once lubricated.
4. Pull both pieces of elastic away from each other to bring the knot up tight to the connector.
5. See steps 5 – 8 above.
There you have it, you should have 2 secure knots attached to your connectors which you can now connect your rigs too and get fishing! If you have any specific questions to ask me, please do not hesitate to contact me.


Recent Comments